Setting up standard client mileage reimbursements in ConnectWise
Managing expense reports is an administrative headache for most companies. Here’s an easy way to not only reduce the amount of time involved with but also standardize how your field engineers report their mileage expense reimbursements.
Step 1 – Create a mileage expense type
If you don’t have one, the first thing you’ll need to set up is a mileage expense type for your staff to use when entering their mileage reimbursemens. Here’s how:
- Navigate to Setup > Setup Tables > Expense Type.
- Click the New icon..
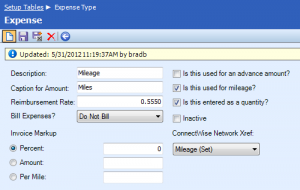
- Create the new mileage expense type. For example:
- Description: Mileage
- Caption for Amount: Miles
- Reimbursement Rate: 0.555
- Is this used for mileage?: checked
- Is this entered as a quantity? checked
- Click the Save icon.
The 0.555 reimbursement rate shown in the example above is the standard mileage rate for 2012 set by the IRS. Customize this as needed to fit your company’s billing and reimbursement policies.
Step 2 – Calculate the distance to your clients
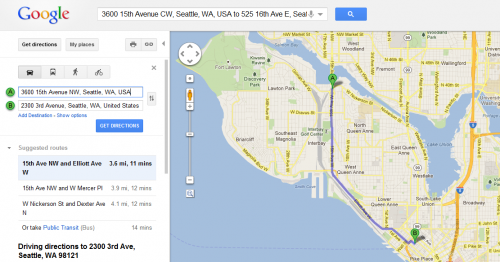
Next, you’ll need to calculate the distance between your office and all of your clients. Be sure to do this for all of the sites a client may have. A tool like Google Maps makes this easy to do.
Step 3 – Set default mileage reimbursement for clients
Using the distances you calculated in step 2:
- Navigate to Contacts > Company.
- Find and open the client for which you’d like to set up a default mileage reimbursement.
- Click the Sites tab.
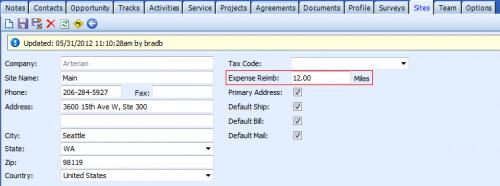
- Click each of the client’s sites and enter the number of miles your company will reimburse for travel to this site in the Expense Reimb field.
- Click the Save icon.
Step 4 – Adding travel expenses
Now that all of the pieces are in place, your staff can enter mileage expenses against either project or service tickets:
- Find the project or service ticket the travel was associated with.
- Click the Expenses tab.
- Click the New icon.
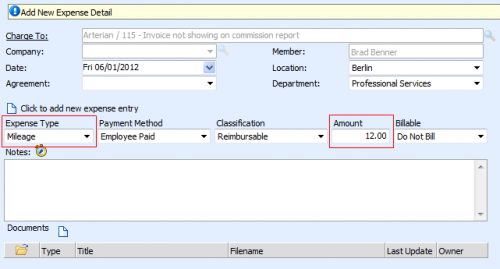
- From the Expense Type dropdown select the Mileage. ConnectWise will auto-magically populate the Amount field with the distance you set up in step 3 for the client’s site that is attached to the ticket.
- Click the Save icon.
A big thanks to Sarah at Arterian for inspiring this post!


